Navigate to:
Handpieces, you know them, you need them. These business-critical pieces of equipment are a mainstay of dozens of procedures and are as varied as a piece of technology can be. This guide to dental handpieces contains everything you need to know about these wonderful pieces of tech, from their categorisation, their functions, how they work to maintenance and sterilisation.
What Are Dental Handpieces?
To put if very simply, a handpiece is a compact machine which applies rotational force to a bur so that the user can cut, polish, and perform several other dental procedures. Handpieces are often either air turbine powered or electrically powered. These different types of handpieces, have different key features which make them stand out. Air turbines, for example are lighter whereas electric turbine handpieces are more consistent and provide less noise when being used. Dental handpieces are usually combined with dental burs, but can also attach to:
- Prophy Angles – utilized for polishing teeth and inserted into low-speed contra-angle handpieces.
- Endodontic instruments such as Rotary Files, Gates Glidden Drills and Peeso Reamers.
- Polishing attachments such as discs, rubber points and wheels.
- Brushes and finishing tools – nylon or bristle brushes, finishing tips and cup polishers.
What Materials Are Handpieces Made Of?
Handpiece neck, head and body are often made using stainless steel, or another autoclavable, long-lasting metal. Some handpieces are made using other materials, such as titanium and brass. These materials can impact the longevity and function of a handpiece significantly. For example:
Brass
Brass exteriors are most commonly found in older handpiece models. Brass has largely disappeared in favour of stainless steel exteriors. This is because brass exteriors dent easily, are less long-lasting, have inferior corrosion resistance and but they are less long-lasting, are prone to denting.
Stainless Steel
At time of writing, the industry standard for handpiece chassis. Stainless steel is very durable, very tough, resists corrosion, and is light enough to comfortably use. Stainless steel has a higher production cost when compared to brass, but its improved durability and resistance to degradation make it a very appealing choice.
Titanium
A premium material for handpieces. Lighter, stronger, and more durable even than stainless steel constructions. Titanium handpieces are more expensive on average, but depending on how often you use your handpiece, and your confidence in maintaining and caring for said handpiece, it could be worth the expenditure.
The Key Parts of a Handpiece
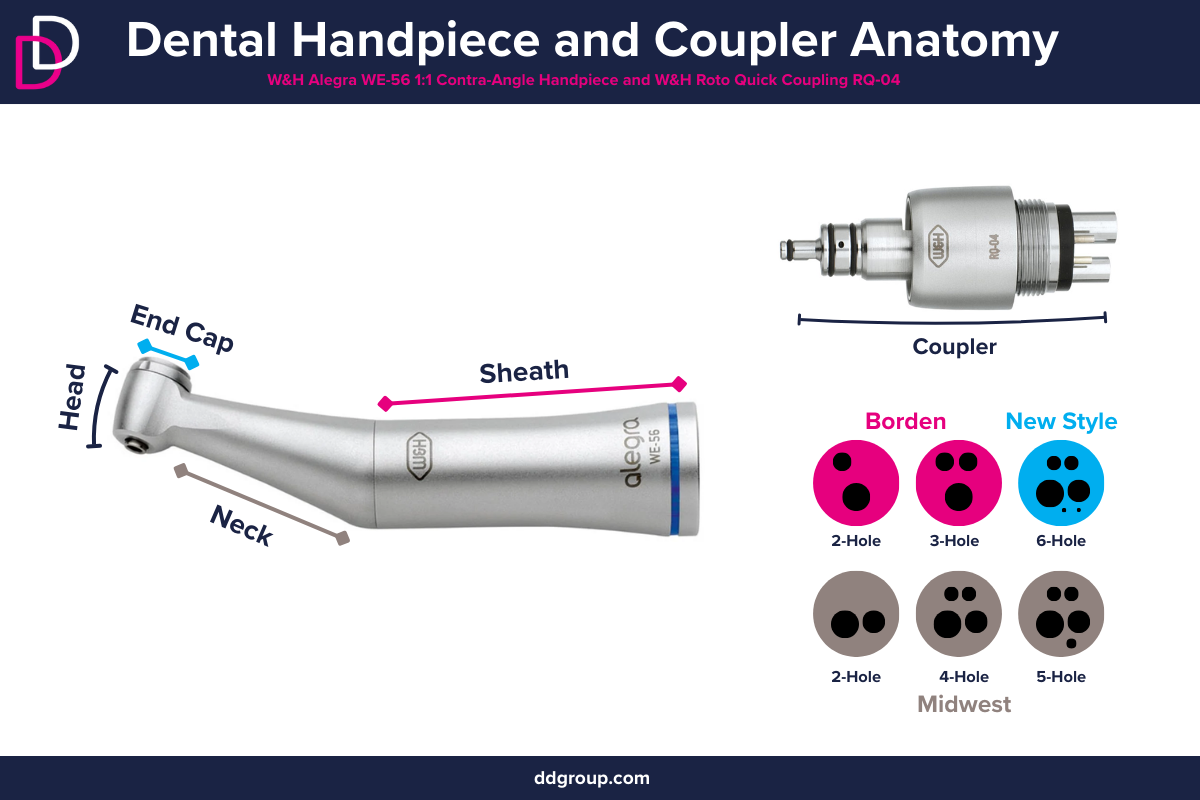
A dental handpieces' anatomy is made up of a body, neck, and head. The head of a handpiece is a rounded, cylindrical tip, often angled so as to provide improved access and ergonomic handling. Each handpiece head has a chuck, a mechanised holder which holds and rotates burs as they cut. A good chuck will securely and tightly hold a compatible bur as it spins. Handpiece chucks are often only compatible with burs of the same type, such as Right Angle Latch etc. Compatibility will be discussed later in this article. A handpiece’s head also may contain a light source, and a water spray to irrigate and cool tooth surfaces which will experience heat build-up.
The angle or “neck” of the handpiece is angled length of material connecting the head to the body. Some handpieces offer slim or ultra-slim necks so as to improve visibility for the inside of the mouth and operating areas. The body of the handpiece is a larger, flared cylinder which contains the bulk of the handpiece’s mechanical connections, which provide the head with air, water and energy. Air is particularly necessary for turbine handpieces, which require pressurised air to power its turbine.
Coupling
Separate from the angle, body and head is the coupler, which is a section of the handpiece which connects the handpiece to tubing. Couplers can come in 2-6-hole variations. This part of the handpiece needs to be compatible with your dental unit so that it can function effectively. There are three variations on coupling designs.
- Borden Couplings – Often 2-3 holes, the larger one for air, the smaller one for water. No exhaust.
- Midwest Couplings – Typically 4-5 holes which may include Air intake, water, fibre optic cables, and an exhaust.
- Six-Pin Couplings – 6-pin connections for air, water, electricity, light, and ventilation.
Shop Dental Handpiece Coupling
Always be sure to check that your coupling is compatible with your dental unit.
Handpiece Angles
The angle, or ‘neck’ of a handpiece will, in part, determine how you hold and use the handpiece, so it’s worth considering when looking to make a purchase. Here are some of the most common types of handpiece necks, their benefits and their features:
Contra-Angle Handpiece – A contra-angle handpiece is curved, often bending slightly back where the neck meets the body, or motor of the handpiece, with its head remaining straight on, or slightly angled. This helps for intra oral usage as its curved design allows for it to access the inside of a mouth, alongside a mirror for visibility, without straining the practitioner.
Straight Handpiece – This is a long, straight handpiece with no edges, curves, etc. These types of handpiece cannot access the inside of the mouth as easily as a contra-angle, but provide excellent precision when used for extra oral work.
Prophy Angle Handpiece – Similar in design to contra-angle handpiece necks, however, the Prophy Angle is exclusively designed for polishing, and is often used with prophy cups or brushes. Sometimes, these handpiece angles are made of single-use disposable materials, such as plastic.
Handpiece Head size
The head size of a handpiece varies from model to model, often within the range of ~ 9.8 x 8.5 mm to 14.5 x 13 mm. In most cases, you would want a handpiece with a smaller head to improve access and visibility, as a larger head would block your ability to see the working area, and potentially be too cumbersome to hold in certain angles. Larger headed handpieces also may produce more noise as the ball bearings contained within rotate. However, larger heads also often have more torque, making them useful in situations which require the ability to cut quickly.
Handpiece Interior
One thing we’ve neglected to talk about in any detail thus far is the handpiece interior. This is because the interior of a handpiece is not something many dentists or dental professionals will need to become overly familiar with unless they want to perform additional troubleshooting preparations. Knowledge of how your handpiece works might help you to notice when it is acting unusually and will help you to more immediately direct an engineer as to what you think the problem may be.
Additionally, the interior of a handpiece needs to be disinfected after each use, just as its exterior does. An understanding of the components which need cleaning will help you to understand locations and crevices where blood or deposits may be hiding.
Please note – this information is intended to be a brief summary of some of the interior components of a handpiece and is not a substitute for a trained engineer’s experience.
Nonetheless, here’s a brief breakdown of the interior components of most handpieces:
Interior of Air Turbine Handpieces
- The Cartridge - Containing multiple sets of ball bearings, an O-ring and the turbine, the Cartridge is responsible for allowing your handpiece to be able to generate enough rotational force to make a bur cut and spin.
- Turbine – The large fan-like interior of a handpiece. The blades of the turbine are subjected to high-pressure airflow, and its turbine spins in response, providing rotational force for the handpiece.
- Ball Bearings – These allow for smooth, controlled rotations. Often stored in the head of the handpiece and made of either ceramic or steel.
- Spindle/chuck – This holds your dental bur in place and is supported by ball bearings which help the bur to be able to turn.
- O-Rings – Soft rings which rest on either side of the spindle/chuck. These help to dampen vibrations, and the noise produced during a handpiece’s rotations.
- Pressurised Air System - Given the nature of turbine handpieces, Air-driven turbines rely on a compressed air system to function. The air pressure is regulated to ensure consistent speed and performance. The system is typically connected to the handpiece through an air hose, which provides the necessary energy for operation.
Are Ceramic Ball Bearings More Fragile Than Steel Ball Bearings?
Put briefly, ceramic ball bearings are not more fragile than steel. Ball bearings take quite a beating when being used in a handpiece. The fragments and debris from operating often impact the ball bearings near the chuck, degrading their performance, wearing down the bearings, and breaking the handpiece eventually.
Ceramic ball bearings are often made using steel themselves, and tend to be lighter, stronger, and have a smoother finish. All of this helps to enhance your handpiece’s ability to function.
The Types of Dental Handpieces
Air Turbine (High-speed)
The most common type of handpiece currently in use, this kind of handpiece has an interior air turbine which is turned using very highly-pressurised air, giving it exceptional rotational speed. These handpieces tend to be lighter, which may make them easier to handle for long periods of time. Turbines are often cheaper to repair than their electric counterparts due to the widespread availability of parts and engineering expertise, but they tend to break down much more regularly, potentially making them a more expensive choice. This kind of handpiece also produces a lot of aerosols, which poses a contamination risk which many find unacceptable in a post-covid world. Finally, air turbines tend to be much louder than other types of handpieces, which can decrease patient comfort, and eventually damage the practitioner’s hearing.
Electric Handpieces
The challenger to air turbine handpieces, Electric handpieces are an increasingly popular choice, offering excellent torque, power, rotational speed and tactile feedback. Quiet, with a choice of variable speeds, and consistent performance, electric handpieces come with a variety of benefits. However, electric handpieces are usually heavier than air turbines and often have a larger head, which may impede access or visibility. Additionally, electric handpieces can tend to be more expensive than air-turbine handpieces up front, as do their repair and maintenance sessions. However, because electric handpieces often require less maintenance than their turbine counterparts, they may end up being the cheaper option depending on circumstance.
In addition to being electric or turbine, handpieces are often categorised by speed and function.
Electric vs Air-Driven Dental Handpieces: Which Is Right for You?
So, you’re choosing a handpiece, and you’re evaluating the differences between electric and air turbine handpieces. Either type of handpiece has distinct advantages, and features which can make them more suitable for you depending on your needs. Let’s consider some of the key differences:
Air Vs Electric, How They Work -
- Air-Driven Handpieces (Turbines): Turning an internal turbine using high-pressure compressed air, these handpieces can rotate a bur at speeds over 400,000 RPM. Lightweight, well-known by most clinicians, and great for fast cutting.
- Electric Handpieces: Using an electric micromotor, this handpiece delivers controlled and constant torque, capable of rotating a bur somewhere between 100,000–200,000 RPM. These handpieces offer enhanced precision and high levels of consistency, which is especially handy during crown and bridge work.
| Feature | Air-Driven | Electric |
|---|---|---|
| RPM | Up to 450,000 | ~200,000 |
| Torque | Lower, variable | Higher, constant |
| Noise/Vibration | Louder | Quieter |
| Precision | Moderate | High |
| Initial Cost | Lower | Higher |
| Maintenance Cost | More frequent | Less frequent |
| Aerosols Produced | High Amount of Aerosols | Less Aerosols |
| Best For | General procedures | Crown preps, implants |
You Should Choose an Air Turbine Handpiece if:
- If your practice tends to focus on routine restorative work
- If you need a lightweight handpiece for longer procedures or general ease-of-use.
- If you’re looking for lower upfront costs, but don’t mind potentially needing more regular maintenance than electric alternatives.
- You’re already familiar with the tactile feedback of air turbine handpieces.
You Might Choose an Electric Handpiece if:
- You want high amounts of torque and precise control during procedures such as crown and bridge implants.
- You want or need a quiet, low-vibration alternative for yourself or for patients.
- You want consistent performance from your handpiece across procedures.
- You’re hoping for less maintenance and potentially higher long-term value from a handpiece.
- You want a handpiece which can have its speed etc set and controlled.
Are Electric Handpieces Worth The Investment?
Electric handpieces are worth the investment. They may cost significantly more upfront, but their precision, and potential for reduced maintenance can help you to gain long-term savings and improved patient outcomes.
Will Electric Handpieces Replace Air Turbine Handpieces Completely?
As things stand, it looks unlikely we’ll be saying goodbye to air turbine handpieces any time soon. While electric handpieces can perform many of the roles of air turbine handpiece, many practices still use both kinds of handpiece for different tasks.
Are Different Burs Required for Electric vs Air-driven handpieces?
No, the same burs can be used between the two. Compatibility depends on shank type. See below in this article, or our Dental Bur Compatibility Guide for a full breakdown.
Low-speed (Contra-Angle and Straight) Handpieces
Also referred to as “slow-speed handpieces”, these are used for tasks which require precise control rather than large amounts of cutting, such as caries removal, finishing, polishing, and orthodontic adjustments. Low-speed handpieces are latch-type (RA) bur compatible have great torque, generate less heat than their high-speed counterparts, and are usually quieter. However, these benefits come at a cost, low-speed handpieces only have an RPM of around 5,000–40,000, and suffer when being used for cutting. These handpieces also require frequent maintenance and require frequent maintenance.
High-Speed Handpieces
Demonstrating high rotational speeds and exceptional cutting power, high speed handpieces are used for cutting, or drilling through enamel, cavity prep, crown margin finishing, enamel removal, and more. These handpieces don't tend to last as long as other types of handpiece, and they heavily rely on water-spray coolant to reduce heat buildup. These handpieces have an RPM around 350,000–450,000 and are usually compatible with Friction Grip burs.
High Speed Vs Low Speed Handpieces – Which to Use?
Whether you need a low speed or a high speed handpiece really depends on the task at hand, most procedures require both types of handpiece, just used at different times. For example, if you’re removing and replacing an old filling, you will need a high-speed handpiece to remove the old filling, and a low-speed handpiece to polish the new filling.
Here’s a quick table on some of the features of high and low-speed handpieces to provide additional context:
| High-Speed Handpiece | Low-Speed Handpiece |
|---|---|
| RPM 350,000–450,000 |
5,000–40,000 |
| Torque Lower |
Higher (especially electric) |
| Noise/Vibration Higher |
Lower |
| Cooling Required Yes (water spray) |
Not always |
| Best For Cutting enamel, crown prep |
Polishing, caries removal |
| Compatible Burs Friction Grip (FG) |
Latch-Type (RA), Handpiece (HP) |
Patient Comfort – Speed Vs Comfort
Due to the fact that low-speed handpieces produce less noise and vibrations, they may be a better choice for some procedures (such as removing dental caries) however, you will have to measure this against the fact that low-speed handpieces may take longer to achieve its intended effects. A patient may be more happy with a brief, uncomfortable procedure than a very long procedure which produces less noise and vibrations.
Surgical Handpieces
Created for oral surgery and implantology, these handpieces have an external saline water spray port for flushing out debris during surgery or cleaning the operating site. Tending to be more lightweight than standard handpieces and built to be robust and long-lasting. These handpieces provide high-speed for efficient tissue removal. Ultimately these handpieces excel in precise cutting and shaping.
Laboratory Handpieces
Too large and too fast to safely use on a living patient, these handpieces are often used for adjusting restoratives or composite before it is sent off to a dental practice for delivery. These handpieces often use specialist burs to grind through and remove large amounts of material.
Endodontic Handpieces
Designed specifically for endodontic files, these handpieces drive and rotate endo files with precision and power. Only compatible with some endodontic file systems, and requiring specialist engineering knowledge to maintain, these handpieces are among the most unique.
Important factors to consider when buying a handpiece
Given the central role dental handpieces take in performing many dental procedures, it’s important you get one that is easy to use for extended periods of time. Here are some key factors to consider when purchasing a handpiece.
Handpiece Weight
A key factor in any handpiece is its weight. Handpieces can weigh anywhere between 85 grams to upwards of 255 grams, so there’s a lot of variation to be found!
If you cannot hold a handpiece comfortably for a long period of time, then this can cause strain, or potentially impact your ability to perform precise procedures. So you might not want a handpiece that is too heavy for you to comfortably handle.
There is, however, some merit to having heavier handpieces. Heavier handpieces often have more power, and in the case of electric handpieces, can be quieter.
What makes a handpiece too heavy or too light will largely be determined by your hand strength, size, and general preference.
If you think handpiece weight is important to you, then be sure to try a handpiece before making a purchase. Demonstrations and working closely with your local business consultant will be very useful for this end.
Handpiece Noise
An often overlooked aspect of a handpiece is the amount of noise it produces. One study (Qsaibati ML, Ibrahim O)[1] demonstrated that handpieces can make up to 92.2 dB of sound. This is above the range in which sustained exposure may cause hearing loss (80-90 decibels). Additionally, a noise this loud may cause significant patient discomfort, especially when working with younger or more nervous patients.
If you’re concerned about the risks of having a louder handpiece, you may want to choose an electric handpiece, or a handpiece with reduced noise features. One such feature would be ceramic bearings in turbine handpieces. These can cut down the noise made by your handpiece.
Handpiece Balance
Almost as important as weight when handling a handpiece, its balance can seriously impact practitioners. To accurately gauge the balance of a handpiece, you will need to connect it to its tubing and use it. Whether this be through a showroom demo, or from a demonstration booked with your local business consultant, practical experience of a handpiece is the best way to determine if it will give you strain after long-term use.
Outside of this direct, hands-on experience, looking at the shape of your handpiece might be able to elucidate its balance. Is the handle flared? Does it have an easy, ergonomic grip? Where is the motor or turbine? All of these can change a handpiece’s balance, and help you rule out handpiece designs you might dislike.
Handle Design
The shape of a handpiece can deeply impact its ergonomics. Reducing the amount of pinching force required to hold your handpiece firmly is the goal. You want a handpiece to rest in the hand as one would hold a pen, with minimal force required to hold and use.
How Do I Use My Dental Handpiece Without Hurting My Wrist?
There could be a lot of reasons your wrist hurts when you use a dental handpiece. If your patient is in the wrong position, if you are holding your handpiece incorrectly, or if your handpiece is simply too heavy, unbalanced and hard to use. First, try stretching before a procedure, then move your patient into the correct position, this will be a position which gives you access, but allows you to keep your wrists straight and your elbows near the body. Then hold your handpiece at the neck, and as you would hold a pencil, between your thumb, forefinger, and middle finger. Be sure to take breaks where you can and stretch.
Handpiece & Bur Compatibility
Some types of burs have different shanks, making them only compatible with certain types of handpieces. We’ve written at length on this topic in our Ultimate Guide to Dental Burs, but here is a refresher on the basic categories of burs, their use, and the types of handpieces they are compatible with.
Friction Grip (FG) Burs
Often used in high-speed handpieces, these burs are used primarily for cutting hard materials, such as enamel, for the purposes of cavity preparation and crown/veneer preparation. These burs are typically made of diamond, tungsten carbide, and zirconia. These burs have a shank diameter of 1.6mm. ISO Codes -313, 314, 315, 316, in varying lengths.
Latch-Type (RA) Burs
These burs, also referred to as Right-Angle attachment burs, these burs are sometimes referred to as “Low-speed burs”. These burs snap-lock into low-speed contra-angle handpieces. Often used for caries removal, polishing, finishing, and providing endodontic access procedures, anything you might use a low-speed handpiece for. ISO Codes across two lengths, 22 mm (ISO 204) and 26 mm (ISO 205).
Straight Handpiece (HP) Burs
These burs are often used in slow-speed handpieces and can sometimes be known as Long Straight Burs. Typically used for surgical or lab work. Typical lengths are 44.5 mm (ISO 104), 65 mm (ISO 105).
Handpiece Care & Sterilisation
Like any other essential piece of kit, dental handpieces require a daily care routine as well as regular maintenance and repair from a trusted engineer. So, how best to care for your handpiece while juggling all the other numerous tasks you face day-to-day in a dental practice? Well, we’ve drawn up a very quick list of regular to-dos to keep your handpiece functioning at its best, without taking too much time away from your more important tasks.
Do I Need to Have a Handpiece Care Routine?
In short, yes. Basic handpiece care includes absolutely necessary steps like interior sterilisation and lubrication/ If your handpiece is performing below standard and is used as normal, it can lead to patient harm from overheating, inaccurate or loose burs, and sub-optimal rotary speeds for your procedure. Even if a lack of care for your handpiece does not impact your patient care noticeably, it can lead to rapid bur degradation or spontaneous breakages. So, for patient safety and to ensure you get the most out of your handpiece, you need a care routine.
What Tasks Are Included in Handpiece Care and Sterilisation?
Handpiece care and sterilisation loosely includes the following tasks:
- Handpiece Cleaning
- Handpiece Lubrication
- Handpiece Sterilisation
- Preparation
- Handpiece checking/troubleshooting
- Proper storage
Step 1 - Preparation
The first step in cleaning and caring for your handpiece is proper preparation. Your handpiece should be detached from its tubing and any burs remaining in the chuck should be removed for autoclaving or disposal, depending on the type of bur you have.
Then, your contaminated handpiece should be placed in a leak-proof container and taken to your chosen area for cleaning and decontamination. The leak-proof container is to prevent the spread of any contaminants.
Bonus tip – Remember to run your handpiece for 10-30 seconds to clean out any remaining air or water before disconnecting its tubing.
Step 2 - Cleaning
Cleaning your handpiece after use is, of course, necessary to clear off larger deposits or biological material which will not be removed via autoclave. Cleaning a handpiece is a little different to cleaning instruments or burs, this is because each handpiece has a complex and delicate interior which needs to be regularly cleaned to prevent it from harbouring germs. While this interior might seem daunting to clean, it is simple when you take the following steps -
- Remove your bur and clean the exterior of the handpiece, wipe it down with a dry, lint-free piece of towel or cloth and rinse it until there is no visible contamination. If you’re looking for a sensitive towel for handpieces, we’d recommend using Bossklein DRYWipes White for their strong, lint-free wipes. If this doesn’t appeal to you, be sure to check your manufacturer’s recommendations to see what will work best.
- Use a handpiece irrigation system. If your autoclave or washer-disinfector has one built in, then it can be a serious time-saver for you. Simply place your handpiece on the stand and follow your manufacturer’s instructions, keeping the pH of the detergent you use in mind, and making sure it is compatible with your handpiece. Once you’re done cleaning, your handpiece will need to be oiled.
- Use a manual cleaning system. Manual cleaning systems for the inside of handpieces do exist, such as KaVo’s QUATTROcare Plus Spray which cleans and lubricates handpieces from the inside.
- Once the exterior is clean and interior has been disinfected, you can disinfect your handpiece exterior – good job!
Can I Immerse my Handpiece in a Cleaning Solution for the Same Effect?
No, this will damage the handpiece and potentially break it. Never immerse your handpiece in any solution.
I Have a Vacuum Autoclave; Do I Need to Clean the Inside of my Handpiece?
While a vacuum autoclave can disinfect the inside of a handpiece, it can’t clean away deposits or any biological matter that may be stuck in its interior. You still need to clean or disinfect the interior of the handpiece to remove larger deposits or residue.
Step 3 – Lubrication
You should always lubricate after cleaning, but before sterilisation. Lubricating your handpiece is an essential step to keeping it working in top condition. If you’ve cleaned the interior of your handpiece, it will likely need lubricating again unless you fall into one of two exceptions:
- You have a handpiece that does not need lubrication (lube-free handpieces). These handpieces are rare but can be convenient.
- Your chosen handpiece cleaner also lubricates as it cleans, such as in the case of KaVo’s QUATTROcare Plus.
Otherwise, you will need to follow these simple steps to lubricate your handpiece:
- If you have a manual lubricant spray, place the handpiece on its nozzle as instructed and depress the aerosol for as long as indicated.
- If you have an automatic lubrication machine such as __________, put your handpiece on the chamber, ensure the machine is supplied with lubricant and functioning. Then activate the machine.
I Lubricated My Lube-Free Handpiece on Accident, What Do I Do?
Once lubricated externally, your lube-free handpiece will now need to be lubricated after every clean, just as an ordinary handpiece would.
Looking For Handpiece Lubricants?

KaVo
QUATTROcare Plus Spray
GOK033
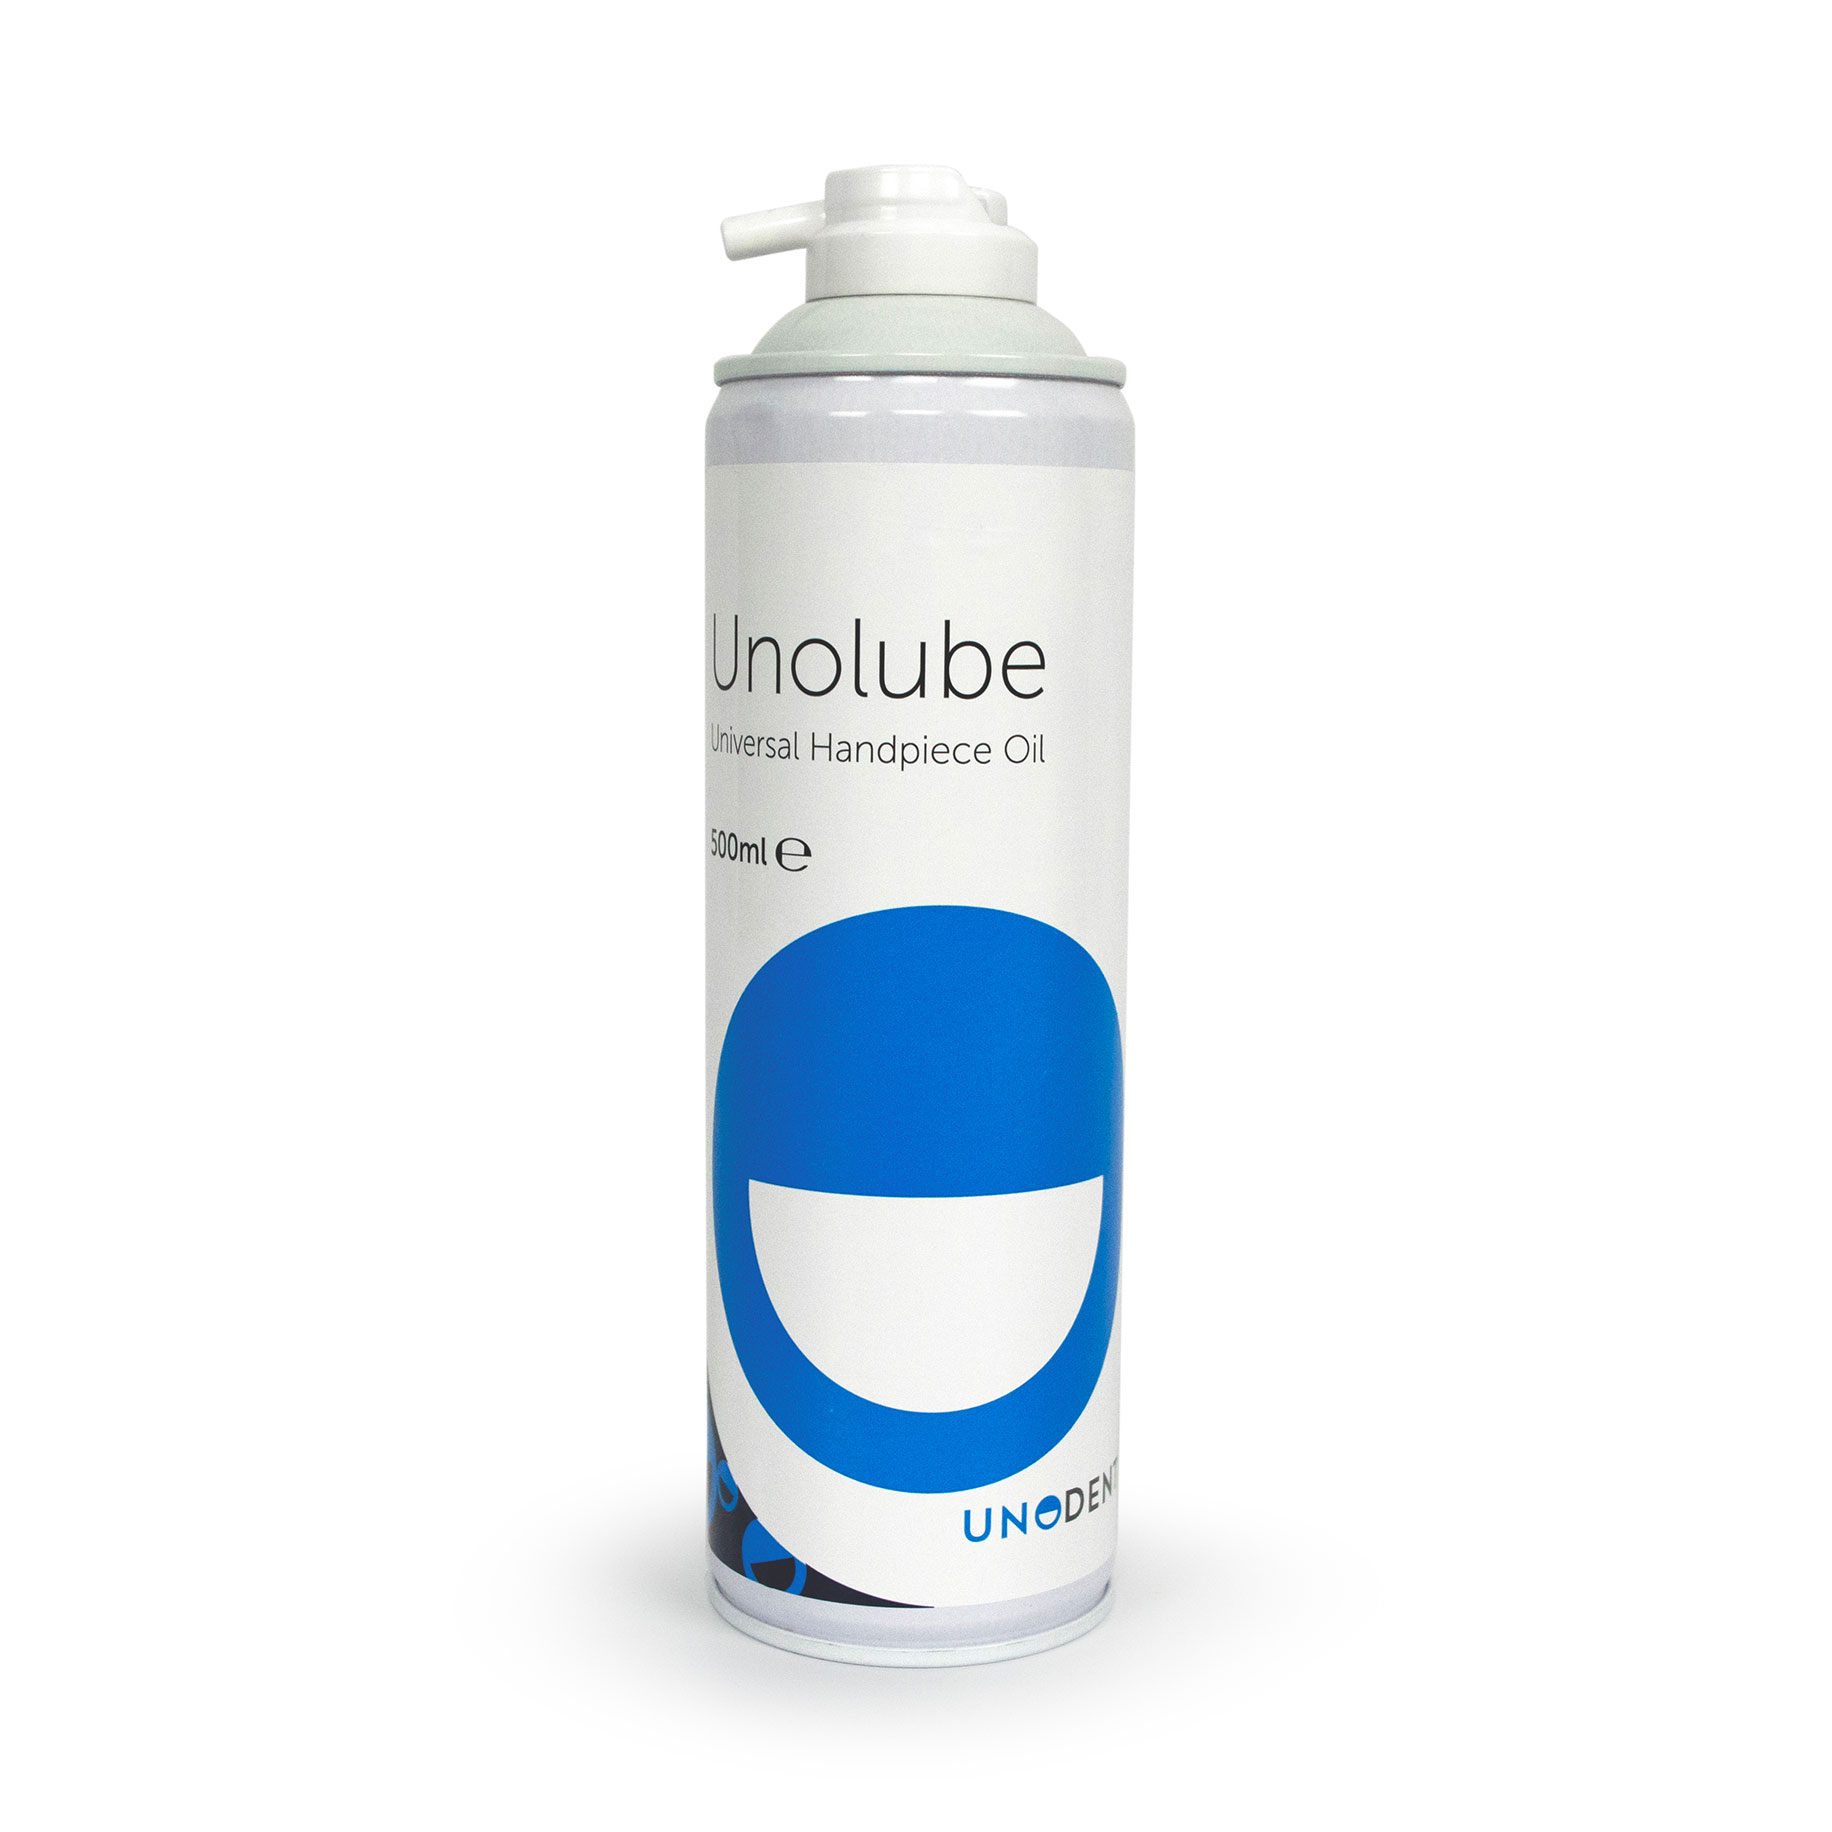
UnoDent
UnoLube Refill Only (No Nozzle)
GOU100

W&H
Service Oil F1 MD-400 Spray Can
GOW000
Step 4 - Disinfection
Now that you’ve cleaned and disinfected the inside of your handpiece, it’s time to autoclave its exterior. This follows standard autoclaving procedure, but if you want a refresher on how to do this, here are the steps:
- Step 1 – Bag the Handpiece. Only do this if your handpiece has been cleaned internally and does not have its bur attached. Ensure bag is properly sealed and compatible with your handpiece. Alternatively, use a cassette.
- Step 2 – Load your handpiece onto the tray shelving in your autoclave. Do not exceed your machine’s maximum load.
- Step 3 – Run your Autoclave’s cleaning and drying cycles. Once completed, allow your handpiece to cool back down to its optimal room temperatures.
- Step 4 – Once sufficiently cool, and without removing from its bag or cassette, inspect your handpiece for any blemishes, deposits, or potential signs of contamination you may have missed.
- Step 5 – Store your handpiece in a way that is compliant with guidelines, handpieces may be stored in the bags they were sterilised in.
Step 5 -Handpiece Checking/Troubleshooting
After your handpiece has been disinfected and removed from its cassette or pouch, it needs to be visually inspected for any deposits or contaminants which have been missed. Once you are sure the handpiece is clean it can be taken away for storage.
This is not where this step ends, however. You need to check your handpiece regularly for signs of degradation or something going wrong. Give your handpiece a test where possible, does the chuck secure your burs tightly? Is its rotary action smooth? How does the handpiece sound when it’s running? Are its lights and water spray systems all operational? The moment something feels off about your handpiece, note it down.
Some examples of handpiece issues include:
- Excessive vibration or shaking – Likely a loose bearing, loose chuck, or some other factor. Try the handpiece with a different dental bur, if the issue persists, your handpiece will need an engineer to repair it.
- Black oil leaking from the handpiece – likely loose debris in the handpiece, clean and re-lubricate until the oil appears clear.
- A rattling or buzzing sound coming from the handpiece – This may require disassembly and inspection. If you are not confident in repairing the broken component, please call an engineer.
- Handpiece overheating – This usually comes from inadequate lubrication. Re-lubricate your handpiece and if the problem persists, call an engineer.
If you are experiencing the symptoms above and are unsure of how to resolve them, our engineering experts can review and service your handpiece. At Dental Directory we offer handpiece repair and maintenance services, with the largest network of engineers in the UK, we're able to guarantee a call out within 8 working hours to get you back up and running.
Step 6 - Proper Storage
Dental handpieces should be stored upright in a location where they cannot come into contact with contaminants or get dusty. Be sure to monitor your sterilisation dates and rotate your handpieces, with a bias towards using handpieces which have been sterilised and stored for the longest amount of time, so as to make sure no handpiece spends too long unused.
When storing a handpiece, always make sure it is completely and totally dry, this helps to make sure that no moisture is corroding any part of your handpiece while it sits in storage.
If you are not intending to use your handpiece anytime soon, or there are no scheduled uses of your handpiece upcoming in your rota, you should store it in a separate, sterile location. Such as a clean room, or a clean cupboard section of a decontamination room.
Where Can I Buy Dental Handpieces Online In The UK?
At Dental Directory, we stock a wide range of handpieces, across W&H, Kavo, NSK, Bien-Air and more. View our full range below.
Shop Dental Handpieces Now[1] Qsaibati ML, Ibrahim O. Noise levels of dental equipment used in dental college of Damascus University. Dent Res J (Isfahan). 2014 Nov;11(6):624-30. PMID: 25540655; PMCID: PMC4275629.