What are Curing Lights?
Curing lights are specialist pieces of dental equipment which are instrumental in photopolymerization, the process by which composites are hardened or set. Curing lights are safe, efficient, and have changed the shape of dentistry for over fifty years now.
To ensure you’re getting the most out of your curing lights, we’ll be answering the three key questions blog below, and also showcasing our Rotomax LED duo with a few fun facts about the invention of light-cure composites too!
- How do I choose the right curing light?
- How do I maintain my curing light?
- What is best practice when using a curing light?
If you don’t know about us, we’re Dental Directory. We’re a dentistry supplier who’ve been happily supporting practices for the last fifty years. We do training, equipment, products, and even full surgery kit fit outs. Once you’re done with this blog, why not see what we can do for you?
Light Work – How to choose the best curing light
Curing lights have a surprising amount of variance from model-to-model.
While each curing light tends to have the same components (a lens, handle, head, and light source), their output, lens size, head size, and wavelength are all factors which bear some consideration. We’ll briefly summarise these factors in a reader-friendly list and highlight the variables we think are most important.
Things to consider:
Wavelength
Arguably the most important factor when choosing a curing light is the wavelength of light it emits. The light-cure restorative that you are using is compatible with a very specific wavelength, and any deviation from said wavelength could compromise your restoration.
Ergonomics
Reducing fatigue may sound like a luxury, but it is not.
A practitioner who is able to comfortably manoeuvre their tools, is much less likely to make a mistake than an exhausted and strained professional.
In the case of curing lights, you can generally break down their ergonomics into four considerations, the weight, balance, buttons, and manoeuvrability. You want a curing light that does not weigh too much, being, well, ‘light’ enough to use without strain, and having a balance which allows you to distribute that weight across your hand and arm throughout use. Button access is another key consideration; you should be able to access all of a curing light’s functions while it is in almost any position. Finally manoeuvrability. Can you move it around the oral cavity with precision? If a curing light is too long or too bulky, it can be hard to use accurately.
Output Power
Earlier, when discussing wavelength, we stated that it was “arguably” the most important feature of a curing light, that’s because Output Power also has an enormous impact on the function of your curing light. Being measured in milliwatts per square centimetre (mW/cm2), output power is often referred to as ‘brightness’ and is directly proportional to how much material can be cured at any one time. The higher the output, the faster the curing process. Output power is often measured using a radiometer, so as to monitor its performance for fluctuations. While it is less likely with modern LED curing lights, output power can decrease over time, which may jeopardise the cure.
Lens & Tip size
The size of the lens determines how much area is being directly exposed to substantial amounts of light at any one given time. A smaller, more focussed lens will be more effective in providing polymerisation for a precise area, whereas a larger lens may be better for larger areas. Common lens sizes range between 10mm to 4mm.
Battery Life & Longevity.
Contemporary curing lights are usually cordless, which helps to save on cable management and cleaning. However, this raises a concern regarding battery life. How long a curing light can maintain maximum output before running out of charge, and how many times its battery can be charged before it begins to degrade. Ideally, you want a battery that is rechargeable, removable, and light enough that it doesn’t weigh your handpiece down.
Types of light -
This is mentioned more for the sake of being thorough. Most modern curing lights are made using Light Emitting Diodes, or LED, but not all of them. You might be able to find halogen, laser, or many other types of curing light available. Each comes with their own benefits and compatibilities.
Maintaining, Inspecting and Using your Curing Light.
Maintaining and checking your curing light is simple enough in most cases, with some organisation and forethought. To help assist with this, we’ll be providing a small checklist of what you need to do to clean, maintain, and thoroughly check your curing light, alongside some of the reasons why each of these tasks are so important.
During procedures -
Eye protection
This one might seem obvious but it always bears repeating. You and your patient need to wear sufficient eye protection to avoid eye strain or injury. Curing lights can be staggeringly bright and the human eye wasn’t designed for regular exposure to that level of illumination. Eye protection can help you and your patient reduce the risk of eye damage during a procedure.
Get your Positioning right
Ensuring the tip of your curing light is in the right place is also essential for a successful restoration. Generally, your curing light tip shouldn’t be more than 5mm away from the restoration, and there should be no shadows cast on the restoration area, so as to guarantee your composite has sufficient light to cure.
Monitor your Heat Build-up
Dental curing lights can build up heat quite quickly. To manage this, we recommend light curing in intervals. For example, rather than doing thirty seconds of uninterrupted light exposure, you would do three sets of ten-second bursts for light exposure, making sure to air cool in between.
After Procedures
Clean and disinfect your light
Like any other piece of equipment, your curing light needs to be carefully cleaned and disinfected after each use. Different lights will have different methods of cleaning, but most will need to be wiped down.
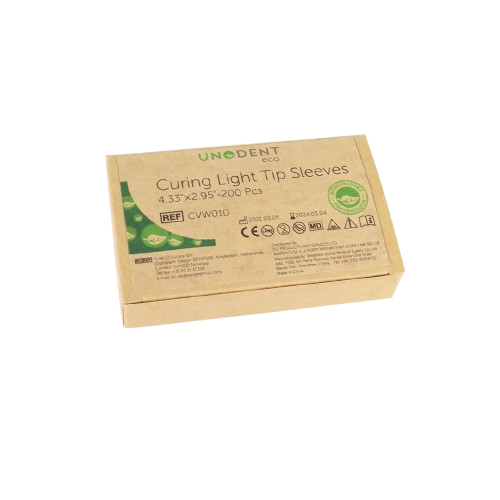
In some cases, practitioners might use a disposable curing light sleeve to help assist in the cleaning process. This will need to be changed after each use.
Daily Tasks.
Inspect your curing light
After each use, and ideally a cleaning and disinfection cycle, please be sure to visually inspect your curing light. This can be for visible signs of wear, discolouration, or visible soil.
Test your curing light
It’s difficult to tell just by sight alone whether or not your curing light is at the correct output or wavelength. To alleviate this, you should test your curing light daily. This can be measured using a radiometer or spectrometer.
As needed
Replace Faulty Tips or Purchase a new curing light.
Faulty tips need to be replaced, as they are not at the optimum light output and might not be capable of curing within the necessary parameters. Please be sure to always utilise compatible tips for your curing light.
Eventually, you might need to replace your curing light. When you do, try to ensure that you purchase your curing light from a trusted distributor.
When Should You Purchase a New Curing Light?
Your curing light should be replaced if it is beginning to consistently fail its tests despite maintenance, or if it shows signs of general wear. As a rule of thumb, curing lights tend to last up until around 2000 hours of use, but this is not guaranteed. Factors such as heat damage, exposure to sunlight, or even simple rough impacts can dramatically shorten the lifespan of a curing light.
Regular testing is the gold standard for ensuring you have a working curing light. If your curing light is capable of outputting the correct wavelength of light at the requisite level of brightness, that’s a good start! The next thing to consider would be if the general wear of your curing light is preventing you from using it properly. For example, does the battery life allow for sustained sessions of light curing? Is the heat buildup manageable? Does the light show signs of general hardware failure like flickering? Its worth being particularly sensitive to these issues when it comes to curing lights, any failure which could prevent your restoration from being exposed to the right amount of light might jeopardise its cure and should be treated very seriously.
ROTOMAX LED Range
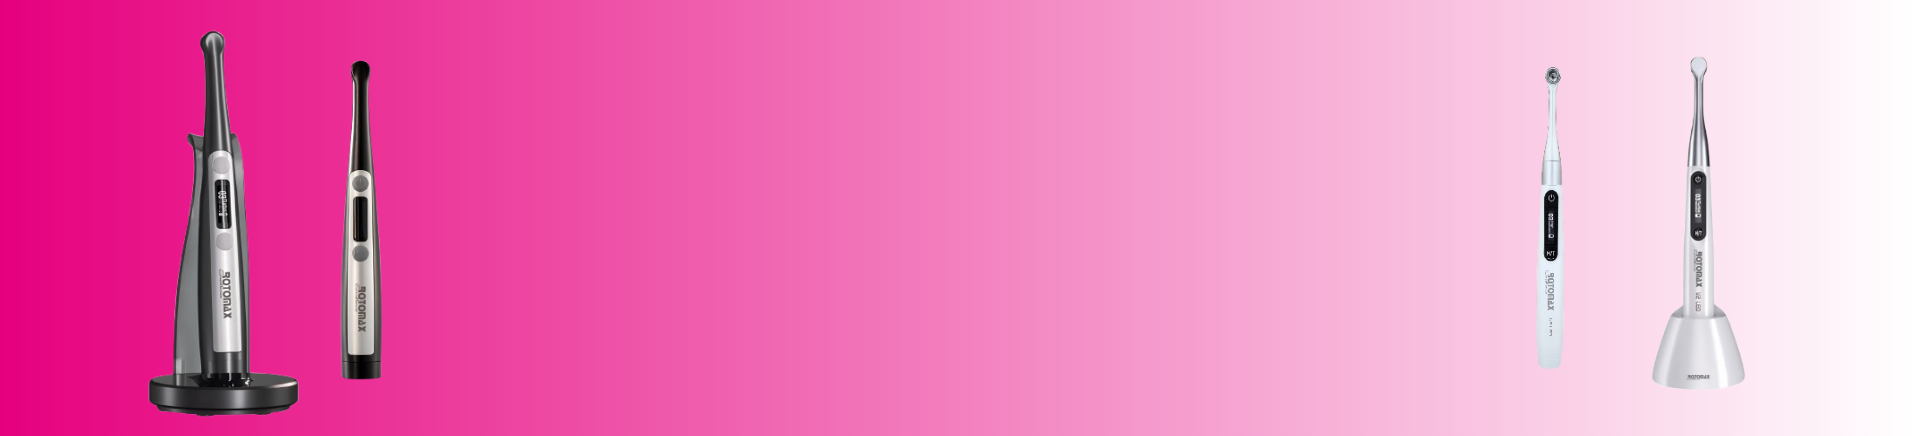
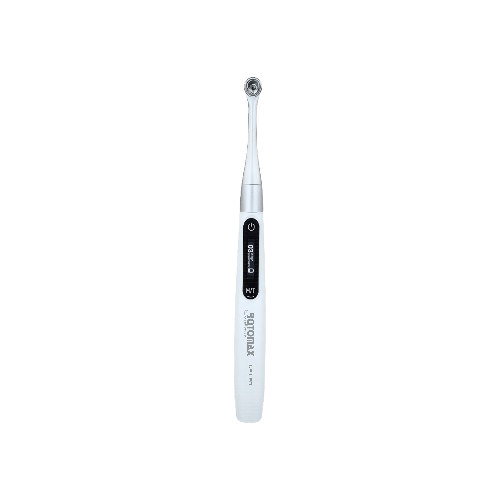
ROTOMAX V1 LED
A versatile, reliable, and ergonomic piece of equipment, the ROTOMAX V1 LED is a broad-spectrum LED light from UnoDent and it demonstrates excellence in every category you might expect.
Versatile - With a superb maximum output of 3,000 mW/cm², this light has the capacity for intense brightness. This brightness can also be adjusted to be as low as 600 mW/cm², making it exceedingly versatile for working with a variety of light-cure restoratives. Additionally, the Rotomax V1 LED can transmit light at multiple wavelengths, capable of transmitting anywhere between 385–515 nm, further broadening this curing’s light’s ability to work with multiple different types of restoratives. Wavelength and output can be custom-selected using any one of the ROTOMAX V1 LED’s programme settings (see below).
One final consideration when discussing the versatility of the ROTOMAX V1 LED is its replaceable tip. Its standard curing tip has a 10mm lens for broad coverage of the restoration area, but it also has an interchangeable set of lenses, including Microcure lenses, Microcure ball lenses, and Endo Guide lenses.
Reliable – Made using a one-piece aluminium body, this curing light has a durable casing, one which also helps to ensure even heat dissipation throughout its body. This is particularly notable, as aluminium is an effective heat conductor, so heat is more likely to spread throughout the curing light’s body rather than remaining solely concentrated in the head. Also of note is the removable, replaceable, and rechargeable 2,600 mAh battery. A replaceable battery goes a long way to support your curing light’s performance.
Ergonomic – Ergonomics often falls to the wayside in discussions about dental equipment – but it shouldn’t! The ROTOMAX V1 LED is designed to be held comfortably, and used with precision, even at the end of a long or strenuous day. Its casing, as we’ve mentioned, is aluminium; a durable and lightweight material. Its interface is a clear digital display with two activation buttons, making it easier to use.
|
MODE |
LIGHT |
OUTPUT TIME |
|
NORMAL |
1,200 mW/cm² |
5, 10, 15 or 20 s |
|
TURBO |
2,500 mW/cm² |
1, 3 or 5 s |
|
ORTHO |
2,500 mW/cm² |
Ortho × 05: 5 cycles of 3 s Ortho × 10: 10 cycles of 3 s 1 s interval between cycles |
|
ULTRA |
3,000 mW/cm² |
1, 2, or 3 s |
|
RAMP |
First 1–5 s: gradual increase from 500 to 1,000 mW/cm², then 1,200 mW/cm² |
5, 10, 15 or 20 s |
|
PULSE |
1,200 mW/cm² with 0.2 s pauses (±10%) |
5, 10, 15 or 20 s |
|
SOFT |
900 mW/cm² |
5, 10, 15, 20, 25 or 30 s |
|
LOW |
600 mW/cm² |
5, 10, 15, 20, 25 or 30 s |
|
CHECK |
No curing power. Caries detection with violet light and an orange protective shield |
30 or 60 s |
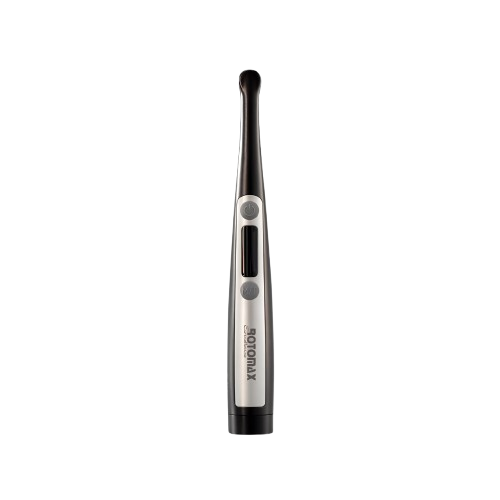
ROTOMAX V2 LED
Similarly to the V1, this curing light is capable of putting out a variety of different light wavelengths, with a range of 385–515 nm, and a maximum output of 3,000 mW/cm². What distinguishes this curing light from the V1 is its 360° head rotation and Stable Output System. Its rotating head massively improves manoeuvrability and access, and its Stable Output System maintains light output and wavelength even when the battery begins to run low.
Rotating Head – The rotating head of this curing light might seem like a novelty, but it produces a significant increase in access. For restorations in difficult locations, it becomes much easier to hold the curing light in a comfortable position and simply turn the light to face your restoration.
Stable Output System – As we mentioned before, battery failure is one of the most common, but least discussed issues for curing lights. As a battery’s charge begins to run low, in most cases, so does its output. Meaning that if a battery isn’t at optimal charge, it has a compromised output and might not produce enough bright light to fully cure a restoration. The Stable Output System eliminates this issue by ensuring a uniform output regardless of battery charge, helping with the longevity of your curing light and the consistency of your restorations.
Five Programmes – Similarly to the ROTOMAX V1 LED, this curing light has multiple selectable programmes, each with a different light output and curing time. Please see the table below for more.
|
Mode |
Light Output |
Time |
|
High |
2,500 mW/cm² |
1, 3 or 5 s |
|
Turbo |
3,000 mW/cm² |
1, 2 or 3 s |
|
Normal |
1,200 mW/cm² |
5, 10, 15 or 20 s |
|
Ramp |
First 1–5 s: gradual increase from 500 to 1,000 mW/cm², then 1,200 mW/cm² |
5, 10, 15 or 20 s |
|
Ortho |
2,500 mW/cm² |
5 cycles of 3 s or 10 cycles of 3 s |
Which ROTOMAX Curing light is right for me?
Both of these curing lights have excellent use cases in their own contexts. For example, the Rotomax V1 has a comprehensive list of nine programmes, making it useful for practitioners who are working with a variety of composites with different curing requirements. Comparatively, the V2 is designed for everyday cases, having a more modest list of five programmes, and a rotating head to help with access and manoeuvrability.
To help you find the right curing light for you, we’ve made a handy table to compare these two Rotomax lights:
|
ROTOMAX V1 LED |
ROTOMAX V2 LED |
|
|
Wavelength Range: |
385–515 nm |
385–515 nm |
|
Output Range: |
3,000-600 mW/cm² |
3,000-500 mW/cm² |
|
Rotatable head: |
N |
Y |
|
Number of programmes: |
9 |
5 |
|
Changeable lenses: |
Y |
N |
|
Ergonomic Features: |
Y |
Y |
|
Battery Features: |
Replaceable battery |
Stable Output System |
|
Straightforward Controls: |
Y |
Y |
The Invention of the Light Cure Composite
The light cure composite was invented in the early 1960’s, originally requiring Ultraviolet light to cure, then eventually being replaced by new formulations between 1970-1980 which only required visible light to reach full cure. This was made possible through integration of camphorquinone (CQ) as well as a tertiary amine activator (co-initiator) within the single-paste resin-based composite. However, the chemicals utilised in early formulations struggled to create an esthetic, or toothlike outcome. Camphorquinone has a strong yellow colouration, which can be reduced with bleach, but only during the polymerisation phase, otherwise the patient’s teeth would have a very visible discolouration. Multiple alternatives were sought after and developed. Now, we have multiple esthetic self-cure composites, which don’t compromise on quality.
There is a case to be made that the invention of the light-cure process put composites ‘on the map’, as it were, as an alternative to amalgam restorations. If you put yourself, briefly, in the shoes of a 1960's dentist, it would be easy to see why:
- Light cure composites were capable of polymerising in practice, meaning that patients didn't need to wait quite so long for their restoration to fully cure.
- Patients were no longer able to cause their own restorations to fail by putting pressure on the tooth before it had cured.
- Light cure composites were leagues more capable of producing an aesthetic outcome than amalgam.
Composite fulfils a similar role to amalgam but is comparatively less invasive and can produce immediate results for restorations in all regions. Minimally invasive, efficient procedures with composite can produce long-lasting, durable, and esthetic restorations, so it’s no wonder that composites have been seeing more and more widespread use since the invention of the Light-Cure system.
Buy the rotomax V1 and V2 with Dental Directory
FAQ
Why was the invention of Light Cure Composites impactful?
Within the context of composite development, Light Cure Composites were revolutionary because they provided a means of rapidly curing a composite in-practice without the use of additional chemical components. This means that the composite could be safely placed and sculpted into an ideal aesthetic form to produce a satisfactory restoration.
How does Light Cure Polymerisation work?
Put simply, the process of light curing is when a photosensitive resin, and oftentimes, a mix of biological materials are exposed to the correct frequency of light and the liquid monomers or prepolymers contained within the composite react to the light by turning into a solid polymer via polymerization.
All this being said, light cure restoratives are a broad category of different products, from different brands, each often being designed with different goals in mind. So, when you’re light curing, bear in mind that each composite has different requirements, whether this is wavelength, time spent curing, or output. It is absolutely vital that if you are looking to light cure a composite, you familiarise yourself with its specific curing process and follow it to the letter. To this end, manufacturer-provided information and workshops are crucial.